# 튜토리얼: 실시간 동시 작업 텍스트 편집기
## Content
이 튜토리얼은 `js-collaboration`과 `js-collaboration-ot`를 사용하여 **운영 변환(Operational Transformation, OT)** 기반의 실시간 동시 작업 텍스트 편집기를 구축하는 과정을 안내합니다. 사용자는 동일한 룸 내에서 리치 텍스트 콘텐츠를 실시간으로 편집할 수 있으며, 모든 변경 사항은 다른 클라이언트에 동기화됩니다.
>type=note
> 이 예제에서는 리치 텍스트 편집기 컴포넌트로 Quill을 사용하지만, 다른 편집기 컴포넌트로 대체할 수 있습니다.
## 사전 준비 사항
* Node.js v16+ 및 npm 설치
* JavaScript 및 터미널 사용에 대한 기본 지식
## 미리보기
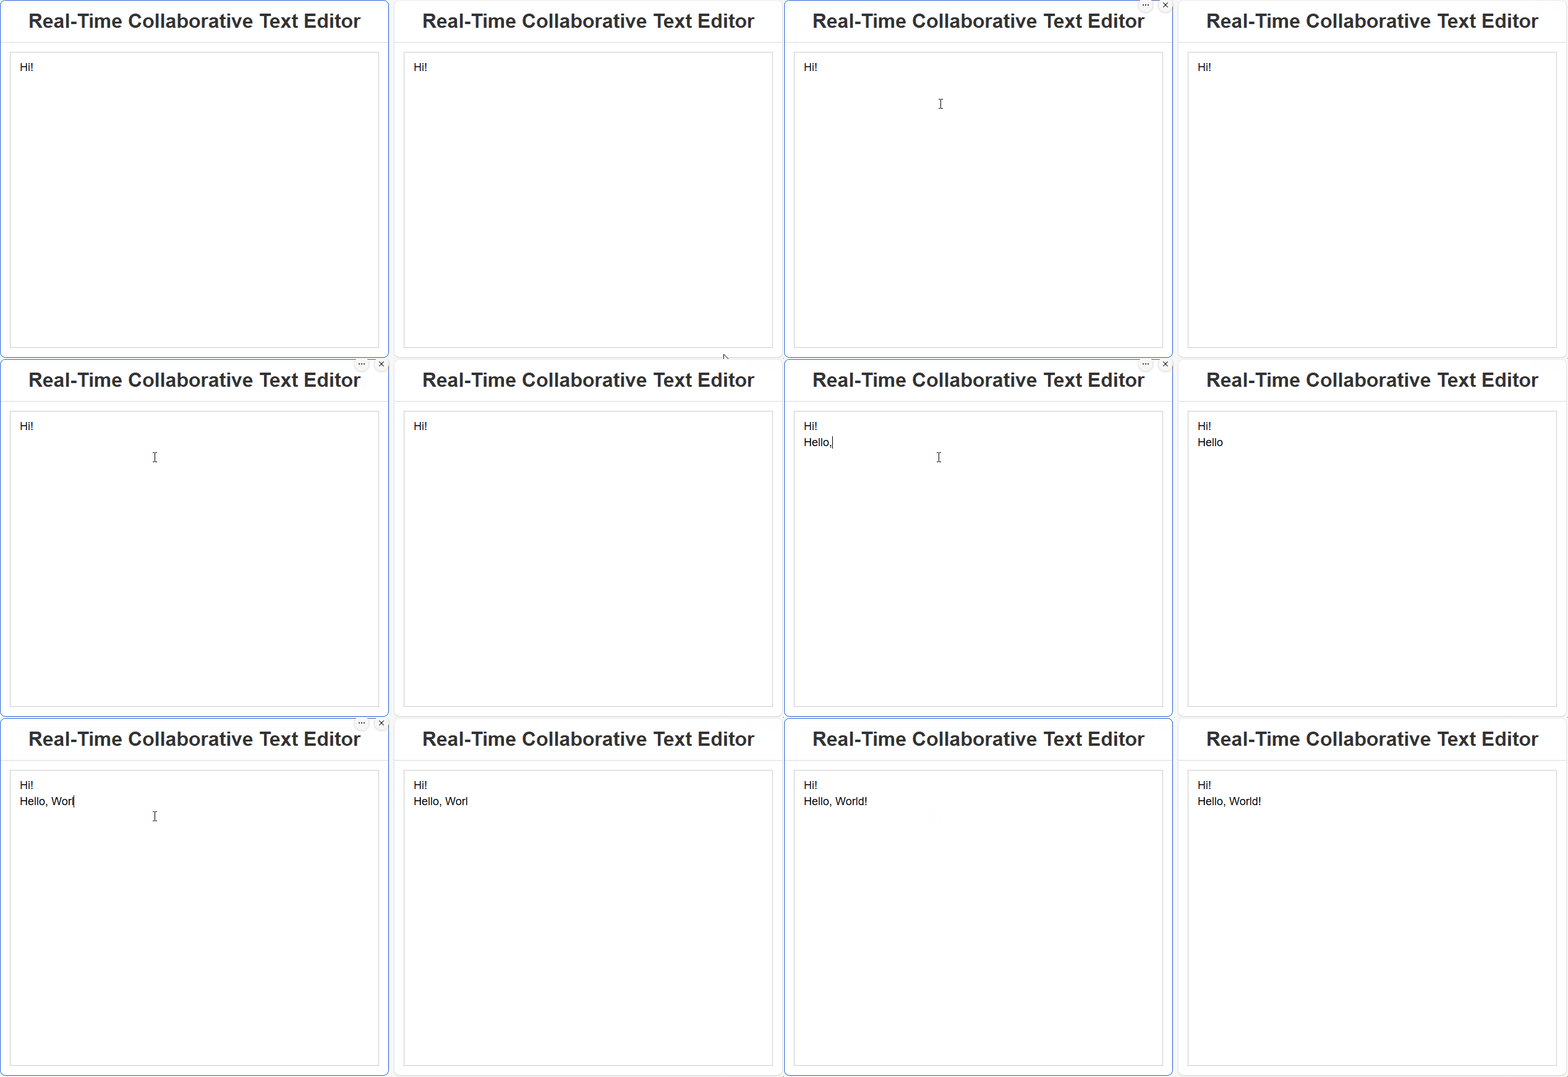
아래 그림과 같이 왼쪽 사용자가 편집기에 "Hello,world!"를 입력하면, 오른쪽 사용자는 실시간으로 동기화된 데이터를 확인할 수 있습니다.
## Step 1: 프로젝트 초기화
1. 프로젝트 폴더 생성
`ot-text-editor`라는 새 폴더를 생성하고 해당 폴더로 이동합니다.
```bash
mkdir ot-text-editor
cd ot-text-editor
```
2. Node.js 프로젝트 초기화
다음 명령을 실행하여 `package.json` 파일을 생성합니다.
```bash
npm init -y
```
ESM 모듈을 활성화하고 다음 스크립트를 추가하도록 `package.json`을 수정합니다.
```json
{
"name": "ot-text-editor",
"version": "1.0.0",
"type": "module",
"scripts": {
"start": "node server.js",
"build": "webpack"
},
"dependencies": {}
}
```
3. 의존성 설치
서버 및 클라이언트에 필요한 npm 패키지를 설치합니다.
```bash
npm install @mescius/js-collaboration @mescius/js-collaboration-ot express
npm install @mescius/js-collaboration-client @mescius/js-collaboration-ot-client quill
npm install rich-text
```
프런트엔드 번들링 도구에 필요한 npm 패키지를 설치합니다.
```bash
npm install webpack webpack-cli --save-dev
```
4. Webpack 설정 파일 생성
프로젝트 루트 디렉터리에 `webpack.config.js` 파일을 생성하고 다음 내용을 작성합니다.
```javascript
import path from "path";
import { fileURLToPath } from "url";
const __dirname = path.dirname(fileURLToPath(import.meta.url));
export default {
entry: "./public/client.js",
output: {
path: path.resolve(__dirname, "public"),
filename: "client.bundle.js"
},
mode: "development"
};
```
5. 기본 디렉터리 구조 생성
1. 루트 디렉터리에 `server.js` 파일을 생성합니다.
2. 루트 디렉터리에 `public` 폴더를 생성하고, 그 안에 `index.html`, `styles.css`, `client.js` 빈 파일을 생성합니다.
최종 디렉터리 구조는 다음과 같습니다.
```bash
/ (project root)
├── public/
│ ├── index.html # 메인 페이지
│ ├── styles.css # 스타일 파일
│ └── client.js # 클라이언트 측 로직
├── server.js # 서버 측 로직
├── package.json # 프로젝트 설정
└── webpack.config.js # Webpack 설정
```
## Step 2: 서버 설정
`server.js` 파일에 다음 코드를 추가합니다.
```javascript
import express from "express";
import { createServer } from "http";
import { Server } from "@mescius/js-collaboration";
import OT from "@mescius/js-collaboration-ot";
import richText from "rich-text";
const app = express();
const httpServer = createServer(app);
const server = new Server({ httpServer });
// rich-text 타입 등록
OT.TypesManager.register(richText.type);
// OT 문서 서비스 초기화
server.useFeature(OT.documentFeature());
// 정적 파일 제공
app.use(express.static("public"));
// 서버 시작
httpServer.listen(8080, () => {
console.log("Server running at http://localhost:8080");
});
```
**코드 설명**
* [OT.TypesManager.register](/spreadjs/api/v19/collaboration/js-collaboration-ot/classes/TypesManager#register)를 사용하여 `rich-text` 타입을 등록합니다.
* [OT.DocumentServices](/spreadjs/api/v19/collaboration/js-collaboration-ot/classes/DocumentServices)는 기본 OT 문서 관리 기능을 제공합니다.
* [server.useFeature(OT.documentFeature())](/spreadjs/api/v19/collaboration/js-collaboration/classes/Server#usefeature)를 통해 OT 기능을 활성화합니다.
## Step 3: 클라이언트 설정
클라이언트는 Quill 편집기와 `js-collaboration-ot-client`를 사용하여 실시간 동기화를 구현합니다.
1. HTML 파일 작성 (`public/index.html`)
```html
Real-Time Collaborative Text Editor
Real-Time Collaborative Text Editor
```
2. 스타일 파일 작성 (`public/styles.css`)
```css
html,
body {
height: 100%;
margin: 0;
font-family: Arial, sans-serif;
background: #f0f2f5;
}
.container {
height: 100vh;
display: flex;
flex-direction: column;
background: #fff;
box-shadow: 0 0 10px rgba(0, 0, 0, 0.1);
}
h1 {
padding: 15px;
margin: 0;
color: #333;
text-align: center;
border-bottom: 1px solid #ddd;
}
#editor {
flex: 1;
border: 1px solid #ccc;
margin: 15px;
font-size: large;
}
```
3. 클라이언트 측 JavaScript 작성 (`public/client.js`)
```javascript
import { Client } from "@mescius/js-collaboration-client";
import * as OT from "@mescius/js-collaboration-ot-client";
import richText from "rich-text";
import Quill from "quill";
// rich-text 타입 등록
OT.TypesManager.register(richText.type);
// 서버에 연결하고 룸에 참여
const connection = new Client().connect("room-id");
const doc = new OT.SharedDoc(connection);
const quill = new Quill("#editor", { theme: "bubble" });
// 문서 구독
doc.subscribe().then(async () => {
// 문서가 존재하지 않는 경우 초기화
if (!doc.type) {
try {
await doc.create([{ insert: 'Hi!' }], richText.type.uri);
} catch (err) {
console.error("Error: " + err);
}
}
// 초기 콘텐츠 설정 및 이벤트 바인딩
quill.setContents(doc.data);
quill.on("text-change", (delta, oldDelta, source) => {
if (source !== "user") return;
doc.submitOp(delta, { source: connection.id });
});
// 원격 연산 수신
doc.on("op", (op, source) => {
if (source === connection.id) return; // 로컬 연산 무시
quill.updateContents(op);
});
});
// 오류 처리
connection.on('error', (err) => console.error("Error: " + err));
doc.on("error", (err) => console.error("Error: " + err));
```
**코드 설명**
1. **공유 문서**: [OT.SharedDoc](/spreadjs/api/v19/collaboration/js-collaboration-ot-client/classes/SharedDoc)는 문서 상태를 관리하고 Quill과 통합합니다.
2. **연산 전송**: `quill.on("text-change")`를 통해 사용자 편집을 감지하고 연산을 전송합니다.
3. **동기화 업데이트**: [doc.on("op")](/spreadjs/api/v19/collaboration/js-collaboration-ot-client/classes/SharedDoc#on)를 통해 원격 연산을 수신하고 로컬 편집기를 업데이트합니다.
## Step 4: 실행 및 테스트
1. 클라이언트 코드 번들링
```bash
npm run build
```
2. 서버 시작
```bash
npm run start
```
다음 출력이 표시되어야 합니다: `Server running at http://localhost:8080`.
3. 기능 테스트
1. 브라우저를 열고 \*`http://127.0.0.1:8080/index.html`\*에 접속합니다.
2. 여러 창에서 동일한 주소를 열고 내용을 편집하여 실시간 동기화를 확인합니다.
## 다음 단계
* [튜토리얼: 히스토리 기능 추가](/spreadjs/docs/v19/spreadjs-collaboration-server/collaboration-framework/js-collaboration-ot/tutorial-real-time-collaborative-text-editor/tutorial-add-history-functionality)
* [튜토리얼: 데이터베이스 어댑터 구성](/spreadjs/docs/v19/spreadjs-collaboration-server/collaboration-framework/js-collaboration-ot/tutorial-real-time-collaborative-text-editor/tutorial-configure-database-adapter)
* [튜토리얼: 실시간 동시 작업 텍스트 편집기에 Presence 기능 추가](/spreadjs/docs/v19/spreadjs-collaboration-server/collaboration-framework/js-collaboration-presence/tutorialadd-presence-functionality-to-a-real-time-collaborative-text-editor)