드래그 앤 드롭
트리 내부에
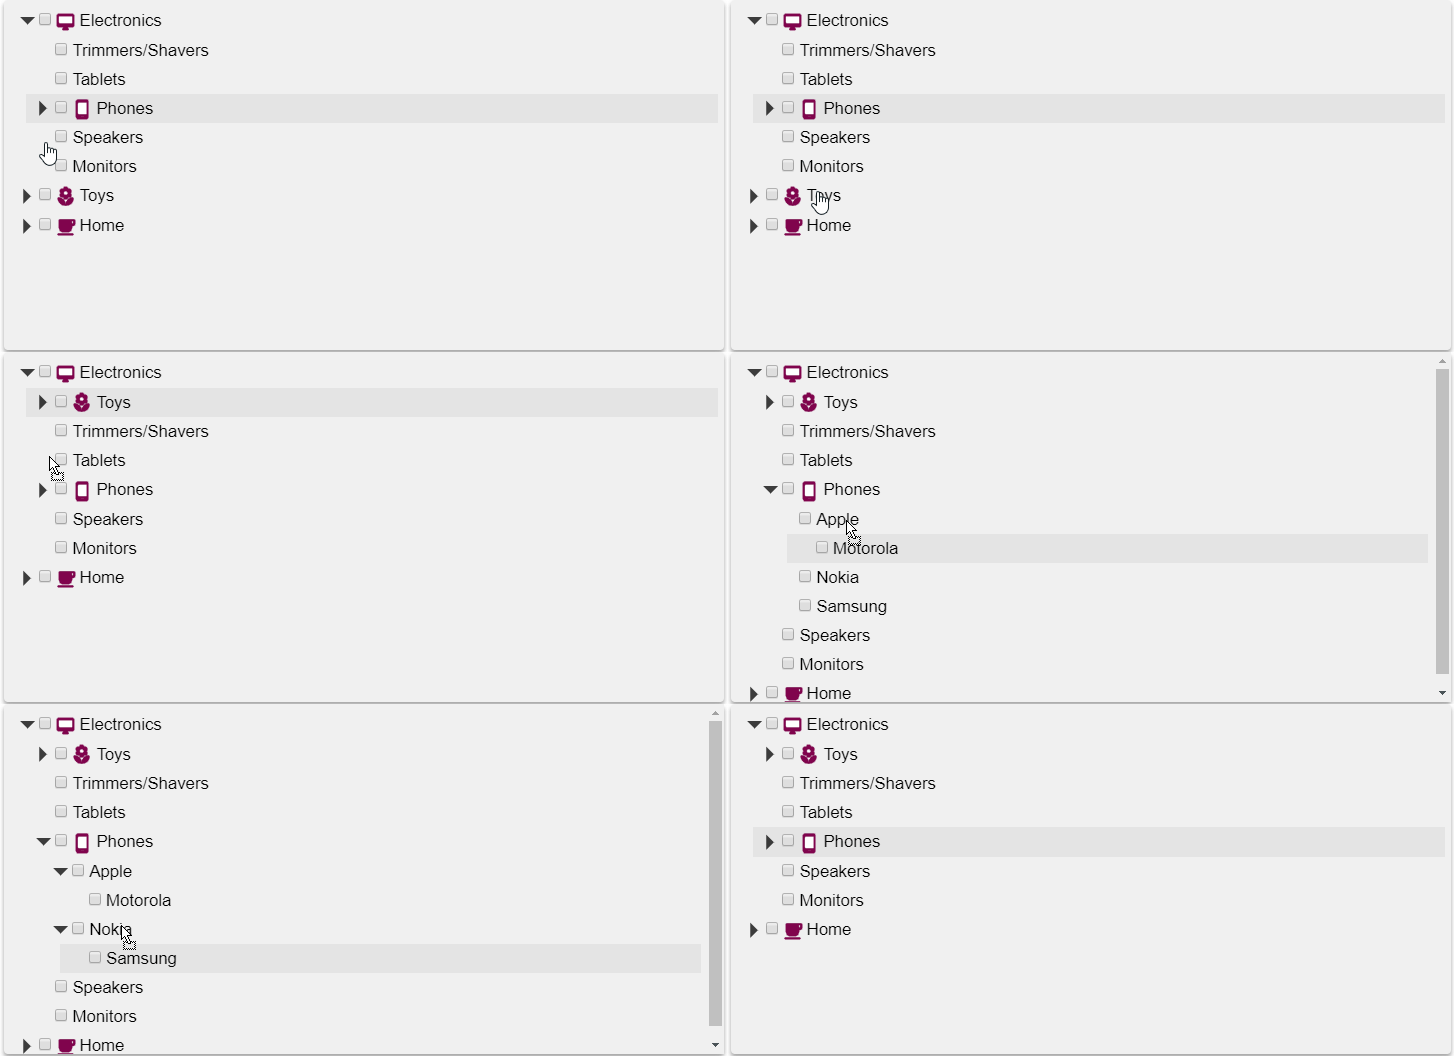
allowDragging 속성을 true로 설정하면 사용자가 TreeView 내에서 노드를 새 위치로 드래그할 수 있습니다.
드래그가 허용되면 사용자는 트리 내에서 어떤 노드든지 다른 위치로 드래그할 수 있습니다. 구체적으로, 노드는 다른 노드 위, 아래 또는 다른 노드의 자식으로 드래그할 수 있습니다.
이 동작은 TreeView의 드래그/드롭 이벤트를 처리하여 사용자 정의할 수 있습니다:
dragStart: 드래그/드롭 작업이 시작되기 직전에 발생합니다. 드래그될 노드를 확인하고, 이벤트의 cancel 파라미터를 true 설정하여 작업을 취소할 수 있습니다.
dragOver: 사용자가 노드를 다른 노드 위로 드래그하는 동안 발생합니다. 현재 목표 노드와 드롭 위치를 확인하고, 드롭을 방지하거나 위치를 수정하려면 이벤트의 cancel 및 position 파라미터를 설정할 수 있습니다.
drop: 사용자가 노드를 새 위치에 드롭했을 때 발생합니다. 현재 목표 노드와 드롭 위치를 확인하고, 드롭을 방지하거나 위치를 수정하려면 이벤트의 cancel 및 position 파라미터를 설정할 수 있습니다.
dragEnd: 드래그/드롭 작업이 끝난 후 발생합니다. 작업이 취소되어 원본 노드가 이동하지 않았더라도 발생합니다.
이 이벤트들의 사용법에 대한 자세한 내용은 드래그 앤 드롭 데모에서 확인할 수 있습니다.

HTML
<div id="theTree"></div>Javascript
onload = function() {

	// create the tree
   var tree = new wjNav.TreeView('#theTree', {
  	      itemsSource: getData(),
		   displayMemberPath: 'header',
           childItemsPath: 'items',
           showCheckboxes: true,
           imageMemberPath: 'img',
           allowDragging: true
	});

   // get the tree data
   function getData() {
	  var imgUrl = 'https://demos.wijmo.com/5/PureJS/TreeViewIntro/TreeViewIntro/resources/';
		return [
    	{ header: 'Electronics', img: imgUrl + 'electronics.png', items: [
		     { header: 'Trimmers/Shavers' },
             { header: 'Tablets' },
             { header: 'Phones', img: imgUrl + 'phones.png', items: [
			     { header: 'Apple' },
                 { header: 'Motorola', newItem: true },
                 { header: 'Nokia' },
                 { header: 'Samsung' }]
		     },
            { header: 'Speakers', newItem: true },
            { header: 'Monitors' }]
	  },
      { header: 'Toys', img: imgUrl + '/toys.png', items: [
      	   { header: 'Shopkins' },
           { header: 'Train Sets' },
           { header: 'Science Kit', newItem: true },
           { header: 'Play-Doh' },
           { header: 'Crayola' } ]
	  },
	  { header: 'Home', img: imgUrl + 'home.png', items: [
      	  { header: 'Coffeee Maker' },
          { header: 'Breadmaker', newItem: true },
          { header: 'Solar Panel', newItem: true },
          { header: 'Work Table' },
          { header: 'Propane Grill' }]
	   }
	   ];
	}
}
다중 선택 기능
TreeView는 다중 선택 기능도 지원합니다:
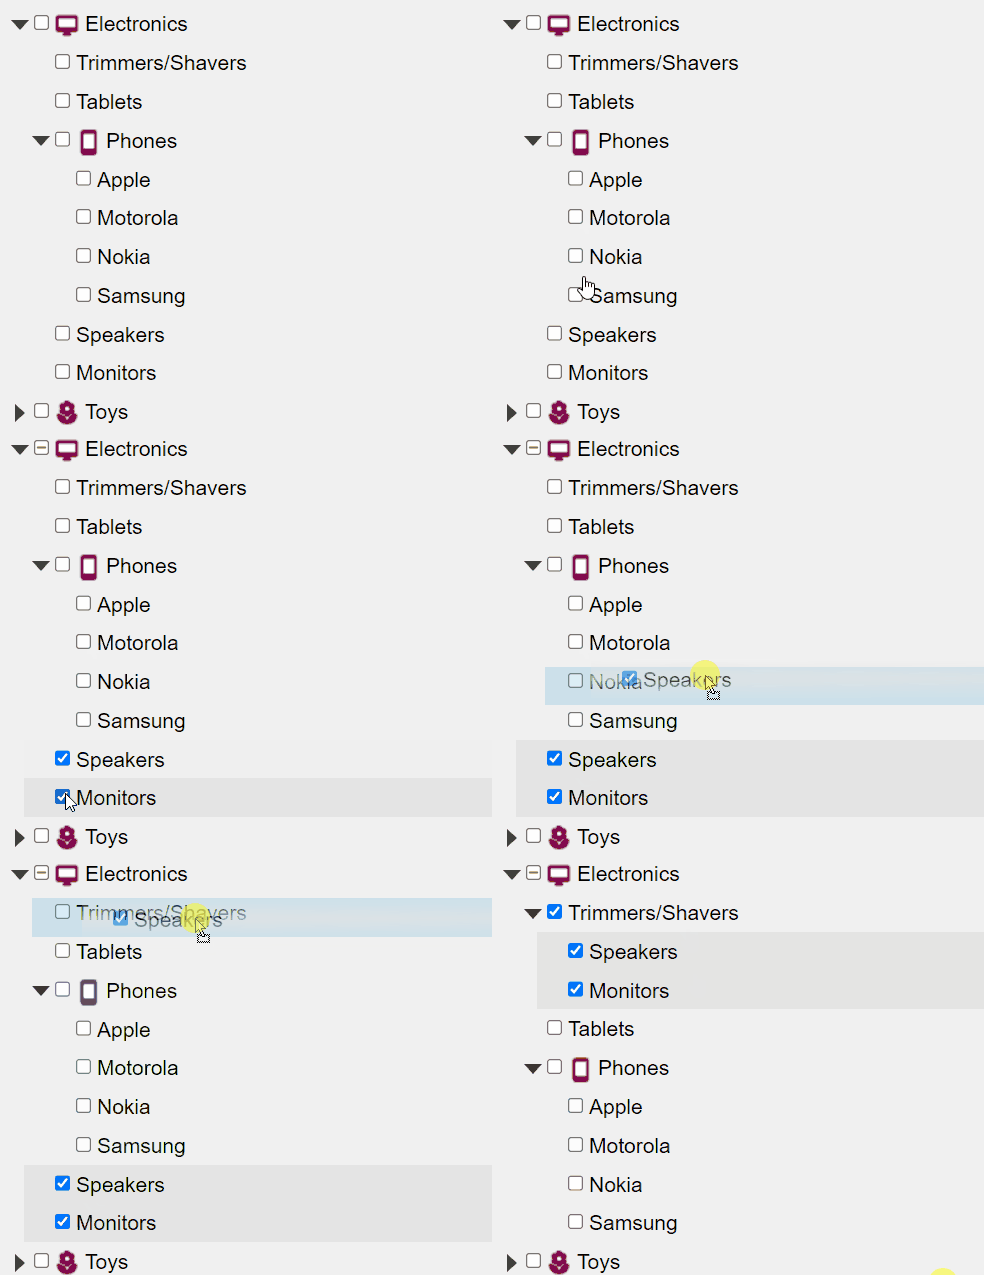
allowMultiSelect 속성을 true로 설정하면 여러 노드를 선택할 수 있습니다. 기본값은 false로, 이 경우 단일 노드 선택 동작이 유지됩니다.
selectedNodes 속성을 사용하여 다중 선택이 활성화된 경우 현재 선택된 모든 노드 목록을 가져올 수 있습니다.
다음은 드래그 앤 드롭과 다중 선택 기능이 모두 활성화된 TreeView를 생성하는 예제입니다:
var tree = new wjNav.TreeView('#theTree', {
    itemsSource: getData(),
    displayMemberPath: 'header',
    childItemsPath: 'items',
    showCheckboxes: true,
    imageMemberPath: 'img',
    allowDragging: true,
    allowMultiSelect: true,
});
function getSelectedNodes() {
    var selectedNodes = tree.selectedNodes;
    console.log('Selected nodes:', selectedNodes);
}
트리 간 이동
allowDrag 속성을 true로 설정하면 사용자가 동일한 TreeView 내에서 노드를 드래그 앤 드롭할 수 있습니다.
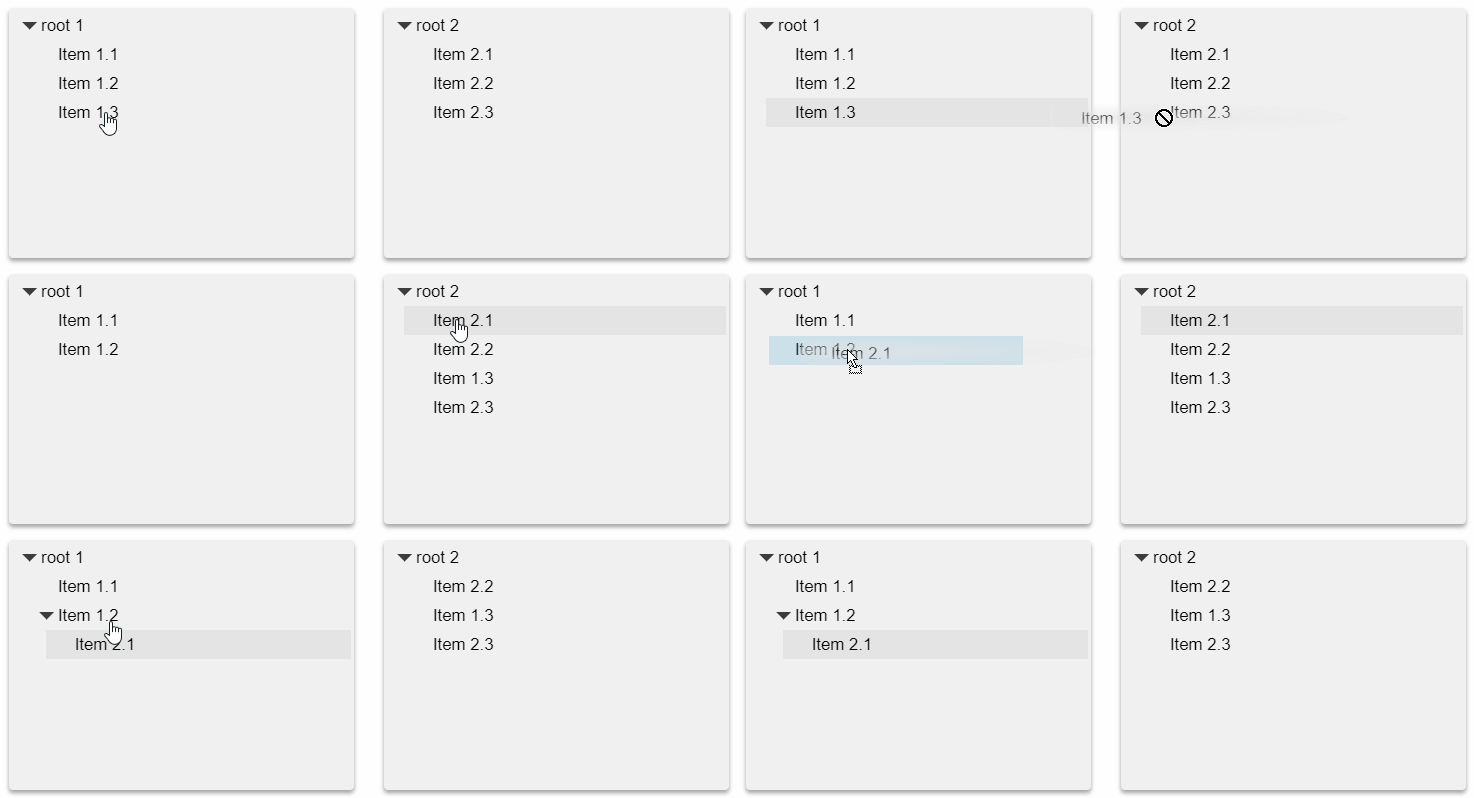
다른 TreeView 컨트롤 간에 노드를 드래그 앤 드롭하려면, dragOver 이벤트를 처리해야 하며, 작업이 유효하지 않으면 이벤트의 cancel 파라미터를 true로 설정하고, 유효하면 false로 설정해야 합니다.

CSS
   .wj-treeview {
        height: 250px;
        font-size: 120%;
        margin-top: 8px;
        margin-bottom: 8px;
        padding: 3px;
        background: #f0f0f0;
        box-shadow: 0 3px 6px rgba(0,0,0,0.16), 0 3px 6px rgba(0,0,0,0.23);
     }
     body
	 {
         margin-bottom: 24pt;
     }
HTML
<div class="container">
  <div class="row">
    <div class="col-xs-6">
      <div id="firstTree" class="short-tree"></div>
    </div>
    <div class="col-xs-6">
      <div id="secondTree" class="short-tree"></div>
    </div>
  </div>
</div>
Javascript
onload = function() {

	// create the trees
    var firstTree = new wjNav.TreeView('#firstTree', {
    itemsSource: [
	    { header: 'root 1', items: [
			{ header: 'Item 1.1' },
    	    { header: 'Item 1.2' },
      	  { header: 'Item 1.3' }]
    	}
    ],
    displayMemberPath: 'header',
    childItemsPath: 'items',
    allowDragging: true,
    dragOver: dragOverBetweenTrees
	});
  var secondTree = new wjNav.TreeView('#secondTree', {
    itemsSource: [
	    { header: 'root 2', items: [
			{ header: 'Item 2.1' },
    	    { header: 'Item 2.2' },
      	  { header: 'Item 2.3' }]
    	}
    ],
    displayMemberPath: 'header',
    childItemsPath: 'items',
    allowDragging: true,
    dragOver: dragOverBetweenTrees
	});

	// handle drag-drop within or between trees
  function dragOverBetweenTrees(s, e) {
		var t1 = e.dragSource.treeView;
        var t2 = e.dropTarget.treeView;

  	    // prevent dragging within trees
        if (t1 == t2) {
    	   e.cancel = true;
        }

      // allow dragging between trees
      if (t1 != t2) {
    	e.cancel = false;
      }
   }
}

